Showing posts with label photography. Show all posts

Sunday, May 16, 2010

The Look of Bugs

If you're in to microphotography of insects and insect parts, you have to check out the work of Charles Krebs. The video below is a news story from Seattle that gives a good amount of information on his technique. I like the fact that he uses what he has and improvises to get some beautiful photos of insects. Go to his web site to see many wonderful photos. Thanks to The Strobist for pointing out this one.

Sunday, April 11, 2010

Spring Is Here

Early Spring Garden-2After several days in a row with temperatures way above normal, Mother Nature got a huge push to get plants going. It seemed like the daffodils came up in just a few days, everything greened up, and the flowering trees came into bloom. It's a beautiful time of year when the Winter greys disappear.

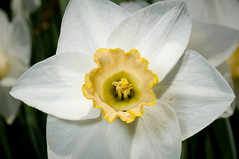
I made a trip over to Michele's garden -- my first visit in the Spring. It was a beautiful, sunny day. There were several types of daffodils in bloom. One is shown at right -- taking using a fill flash to get some light into the center of the flower. A fill flash also creates some shadows that give a bit of depth to the straight on view.

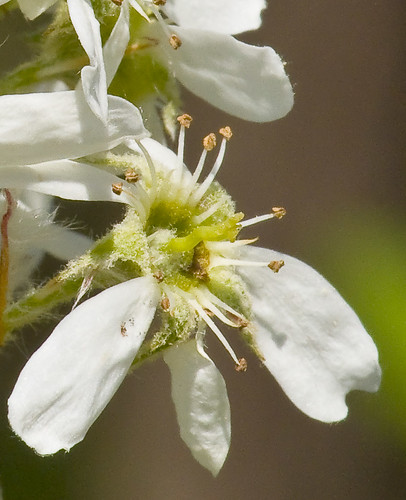
There were lots of flowering trees to look at too. The photo below shows a close-up of one of the blossoms.

Early Spring Garden-22

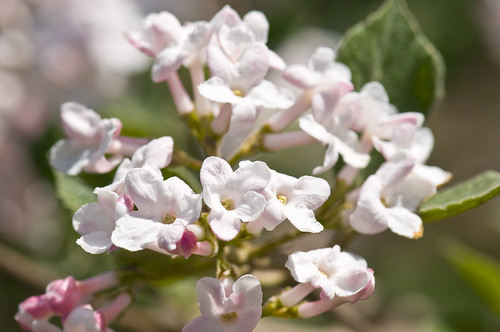
This is one of my favorite photos of tree blossoms.
Early Spring Garden-19

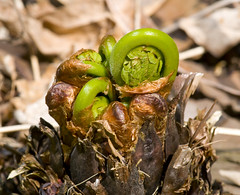
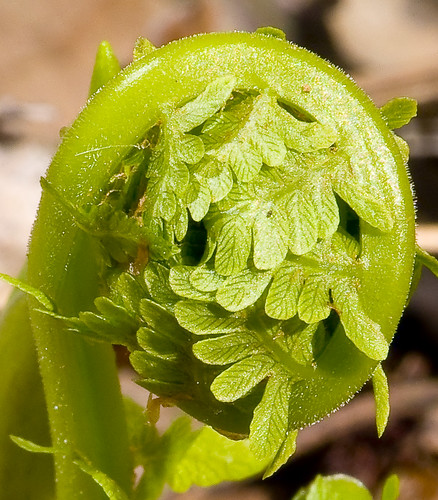
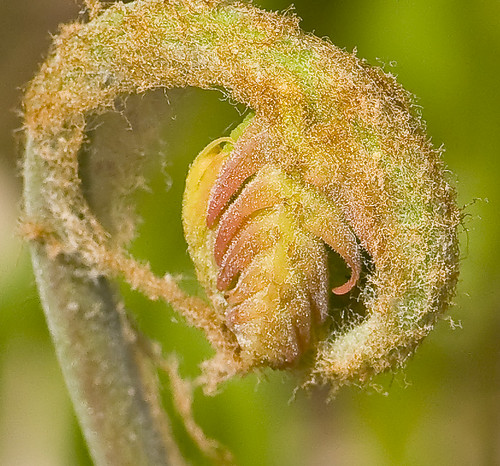
Busting OutThe subjects I found most interesting were the fiddlehead ferns that were just starting to emerge from the ground. Michele pointed them out -- otherwise I would have missed them. The photo at right shows them just as they stalks start to come out. When they get up a few inches, you can see a well developed structure even though they are only about the size of a $0.25 piece. The first photo below shows a macro view at an early stage. As they get a bit higher, a kind of red fuzz appears on the stalks and the head. The second photo below shows the fuzzy texture. In both cases I used a fill flash on the side away from the direct sun to get rid of the dark shadow.

Starting to Emerge

Fuzzy Fern

You can see all the photos from my visit in a Flickr set here.

Saturday, August 08, 2009

Second Strobist Bootcamp Assignment

The second assignment in the Strobist blog's summer bootcamp was food photography. The classic approach for a typical food dish photo is to have the key light coming from the top down using a softbox. I made a softbox quite awhile ago using a shoebox. I lined the inside with aluminum foil, cut a hole in the side just big enough for my flash, and topped it with tracing paper to diffuse the light. It was pretty well for a simple, homemade contraption.

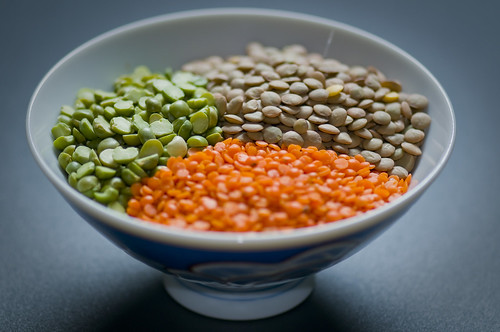
The first photo is of red lentils, brown lentils, and split peas arranged in a bowl (thanks to Dianne) that is sitting on top of a black IKEA cutting mat. I used just a single flash into the softbox that was held pretty close to the subject just above and behind the bowl. I also used a silver reflector just below the camera in order to soften the shadow on the front of the bowl. I like the lighting and the colors.

Lentils and Peas

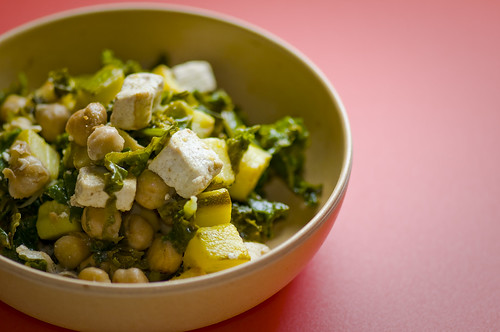
The second photo is of my favorite vegetarian dish -- a lemony chickpea stirfry. The lighting setup was the same as the photo above. The recipe is from the 101 Cookbooks blog. It contains tofu, kale, chickpeas, the zest and juice from a lemon, and zucchini. The bowl is sitting on a red IKEA cutting mat. I wanted the red to compliment the green of the kale.

Lemony Chickpea Stirfry

Sunday, August 02, 2009

Strobist Activity

I certainly have a backlog of photo work to describe -- things I've done over the last few months. The Strobist blog has probably had the greatest influence on my photo activities of late. The basic idea of the Strobist group is to get your flash or flashes off the camera to have the light coming in at different angles on the subject. You can use that approach to create interesting effects or enhance natural lighting and balance the overall exposure.

Since I'm new to the Strobist ideas and how to apply the concepts with my equipment, I've been experimenting with non-macro subjects. This summer the Strobist blog is having a lighting bootcamp where assignments are given every several weeks. The intent is to get the basics down by forcing you to try different techniques. The assignments have also been geared to try and help others in some way.

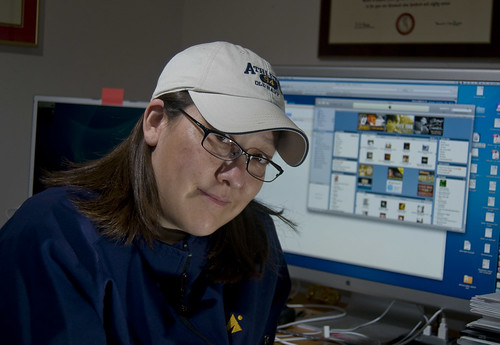
The first bootcamp assignment was to make two headshots that was somehow related to the state of the economy -- and also get a photo folks could use for a resume or website or whatever. One was to be a self portrait and the other had to be a friend. I've always wanted a teaching related photo so that one was easy. I talked Dianne into getting a photo in front of her computer since all her work is computer based.

For my photo below I used three flashes. High and right front I bounced a flash out of an umbrella for the main overhead light. A second flash with a grid came from the left behind my head and was focused on the writing on the blackboard. Finally, front low left there was a third flash to ease the shadow on the right side of my face. I was pretty pleased with the result.

Thinking About Molecules

For Dianne's photo, I first adjusted the exposure settings to get a good exposure on the monitor -- that was in effect my key light for the exposure. The main flash light came from high left bounced out of an umbrella. That light put a huge shadow on her face because of the ball cap. To reduce that shadow, I put a second flash low and right with a grid that was focused on the underside of her cap. If I were to do it again, I would soften that light a bit with a diffuser so there would be a little more of a shadow. But not bad for a first try. I'll describe some of my other Strobist style photos in future posts.

At The Computer

Wednesday, September 17, 2008

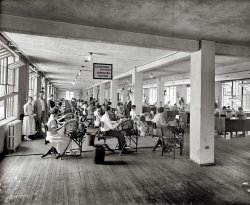
Cubicles Aren't So Bad

I work in a cubicle environment. It's nice for co-location of work groups (although I spend a lot of time on the phone working with other sites or partners), but the distractions can sometimes be frustrating when you're trying to focus.

But then I see a photo like the one here, found on the Shorpy Photoblog, and it reminds me that life in a cubicle isn't so bad after all. Go here to see the post and the description. The Shorpy site posts old, mostly B&W photos that illustrate what life was like in years gone by. There are some interesting photos -- made all that much more amazing when you think of the photography equipment used in days gone by. Check it out!

Thursday, September 11, 2008

Enhanced Podcasts

I like the new Apple iPhone -- although not as much as Dianne who absolutely LOVES her iPhone. Rather than move my music from my iPod over to the phone and suck up all the phone memory, I decided to leave my music and photos where there were and use the phone for podcasts. I never have been much of a podcast listener. It seemed like too much effort to subscribe and download the latest and greatest (even though it is really simple). Since I'm connecting the phone to the computer a lot, that barrier goes away. The podcasts also give me something to listen to if I have some down time while waiting somewhere.

I enjoy the standard audio podcasts. I listen to several science podcasts, the news from Lake Woebegon, etc. But it wasn't until I started poking around for other podcasts to get some variety that I appreciated the value of an enhanced podcast. The enhancement is that the creator can display images and synchronize them with the podcast audio. You can view them on-line or mobile if you have an iPod capable of displaying video.

The two podcasts that really drove that home for me are both from Jeff Curto, a photography professor at the College of DuPage. One is called Camera Position and consists of fairly short commentaries on one or a small handful of photos. Jeff uses the enhanced podcast very well to show the whole photo he is talking about or to zoom in on a region of the photo to make a point. I'd highly recommend this series if you're in to the history and the creative side of photography.

The other podcast Jeff does is called the History of Photography. These can be longer podcasts from his college lectures, but again he uses the video iPod images very well to enhance his presentation. The summer series of podcasts was a bit more condensed. I wish I would have had something like this when taking art history in college!

With my new found appreciation for enhanced podcasts, a recent post on the Swissmiss site about a video podcast on origami sounded pretty cool. Has anyone been following this series?

Saturday, August 30, 2008

Interesting Photography Sites

I'm going back through blog posts I've added as favorites over the last few weeks. There have been several interesting photography related entries.

The first went viral pretty fast. The writer of the Morbid Anatomy blog, Joanna Ebenstein, put together a collection of photos taken of items in public museum collections. You can look at the results here -- click on Gallery. It's a wonderful body (no pun intended) of work! Joanna is now looking to extend the project to include photos of items in private collections.

Speaking of photographing items in science museums, Meera Sethi, a member of the Utata group, has an excellent post about photographing items in museums. You can read the post here.

If conventional light photography is too mundane, go out and get a few x-ray machines and make some photos that way like Nick Veasey. Wired Magazine had an interesting article on Nick and his use of x-rays. I liked some of the composite images where he has stitched together radiographs of separate objects to make a scene that appears to have been x-rayed all at one time. Check out the images in the article.

Finally, I'm always a sucker for high speed photography. Flickr user Nebarnix has an amazing set of high speed photographs in his Flickr photostream. They are worth a look. The photo below of an egg getting blasted is one of Nebarnix's shots. This is a favorite from Nebarnix's collection.

Friday, April 11, 2008

Stripes

I was playing with some more physiograms the other night. I have an assortment pack of lighting filters and cut some pieces to go in front of the lens. By moving them on and off the lens while taking the picture you get stripes of color in the photo. I like the green one best.

I was also experimenting a bit with multiple exposures in the camera. That's going to take some more work. Maybe in a future post.

Stripes 3

Stripes 1

Stripes 2

Wednesday, April 02, 2008

Physiograms

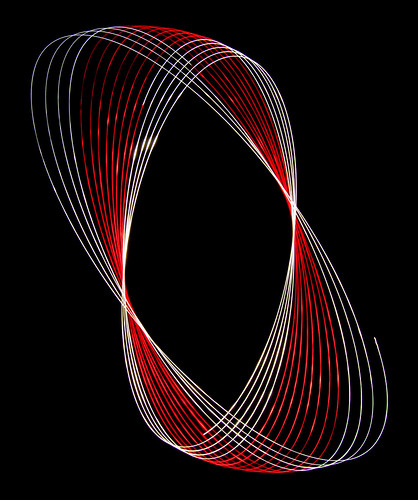
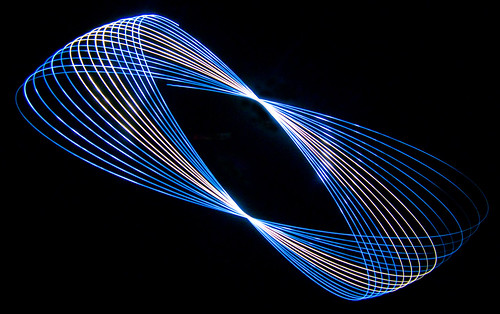
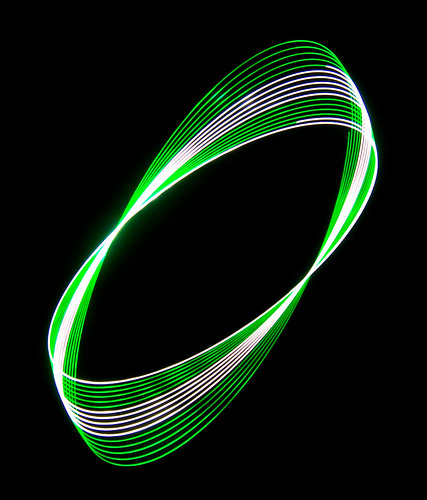
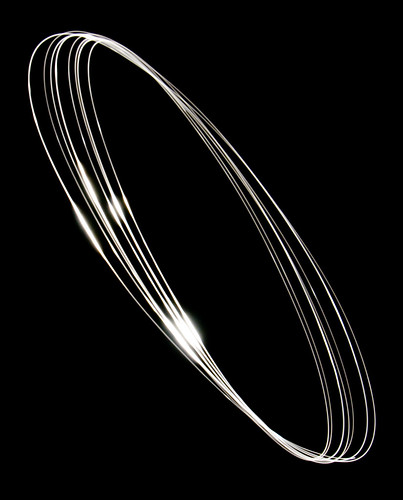
Thanks to a Flickr friend and a fellow ham radio operator, John, I was introduced to and inspired to try making a physiogram. It's just a fancy term for a photographic pattern created by moving a point of light over a photo-sensitive surface or with a camera. The basic idea with a camera is to put your camera on the floor looking up in a dark room with the camera focused on a flashlight on a piece of string hanging directly over the camera. By putting a cover with a pinhole over the flashlight lens, you have a point of light. By swinging the flashlight and using a long exposure time, you paint a line of light as the pendulum swings. The patterns remind me of results I got with a Spirograph as a kid.

It actually sounds easier than it is. I got things set up in the basement a few days ago and once the sun went down I started experimenting. It took a bit to get the right exposure settings / film speed to capture the light properly. Here are my first attempts. They aren't great. In the first photo, the spacing between lines from successive cycles varies a lot and there are some 'hot spots' with the exposure. The second photo has those problems and also you'll notice the lines aren't smooth curves -- there is some wobble. Also I couldn't get good travel through a large arc.
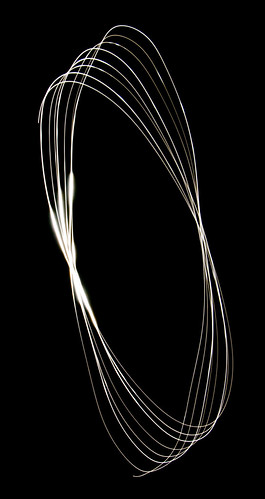
Physiogram 1

Physiogram 3

So after consulting with John and doing some thinking about the causes, I was able to improve my results. First, I wasn't getting a smooth release of the light so there was some wobbling. Holding the flashlight at its center of mass when you release it helps a lot to prevent wobble of the light. Second, the irregular path in the second photo was caused by an off center pinhole in the cardboard covering the flashlight and the fact that the light wasn't hanging straight. When you release the light, it inevitably spins a bit on the string. If the pinhole is off center, the result is a wobble in the light when swinging. Third, the irregular spacing and lack of turning was caused by a d-ring thru a screw eye in the ceiling that was supporting the pendulum. I ran the string through the d-ring because I was too lazy to take a minute, grab the step stool, and put the string the screw eye directly. The d-ring swings a bit, but preferentially in certain directions. It also doesn't have the same travel as the string. That caused the irregular spacing and lack of movement.

On my next set, I used aluminum foil to cover the flashlight and used a pin to make a hole right in the center. I rigged a wire loop symmetrically around the flashlight so it would hang straight. Finally, I ran the string directly through the screw eye. The photos below are the results after those tweeks and some practice on smooth starts of the pendulum. Comparing these to the above pair you can see the improvement. The first photo is taken with the reflector still in the flashlight. That makes some light come out at large angles from the pinhole that gives the arcs a metallic reflection appearance. The second photo has the reflector removed so the light is a single beam coming out. They have different characters, but I like them both. Any preferences? I have some other ideas for future trials.

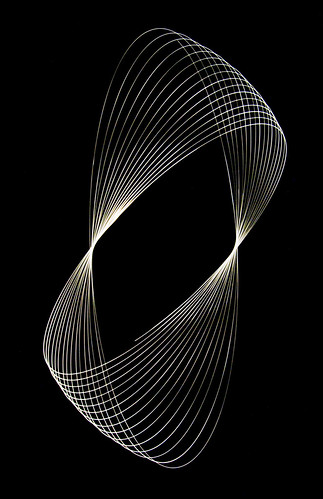
Physiogram 5

Physiogram 4

Thursday, November 29, 2007

Capture Cincinnati Release

Tonight Dianne and I went to Joseph Beth Books at Rookwood Pavilion for the release of the Capture Cincinnati book. I posted about the project a while ago. It was a local effort to make a coffee table book of the best Cincinnati area photos contributed by mostly local photographers.

The organizers had a release event to announce the winners of the various photo categories. The grand prize winner was Melissa Speelman -- very well deserved! She has a great photoblog where you can see her latest people photos. It was a event and I was able to meet several folks that participate in the "Living in Cincinnati" group in Flickr. That was fun.

The Capture Cincinnati book has a wonderful collection of photos from the area. I don't have any photos in the book, but I have several that made it on the accompanying DVD -- most of them in the "news" category. Everyone who participated was guaranteed one photo on the DVD, so it's cool that I have a few. Thanks to everyone who voted for my shots!

Sunday, November 04, 2007

Paper Macros

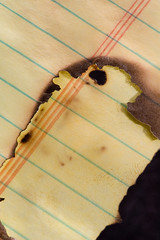
Charred NotebookThis week the Macro Mondays group on Flickr has a theme of paper. As usual, I consulted with Dianne to get some ideas for the theme. She thought a burned or charred piece of paper would be interesting. The photo to the right is a couple of charred pages from a pad of paper. A bunsen burner really makes quick work of this job. There are a couple other photos of charred paper in my set of paper macro photos.

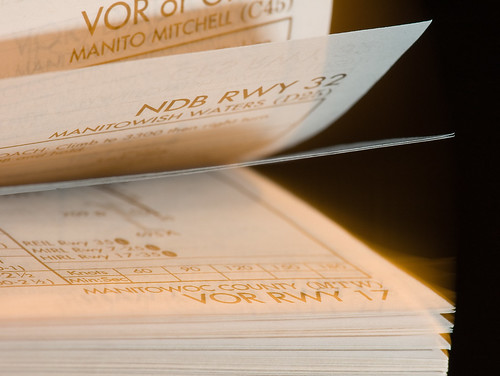
Dianne also thought a photo of pages flipping would be interesting. The trick was trying to catch the motion. I used a set of charts printed on telephone book type of paper -- instrument approach charts used when flying into an airport under poor visibility conditions. They are replaced every couple of months, so I had plenty around. I used a slow, rear sync flash to catch both the pages themselves as well as the motion blur of the pages as they fell. I took about 30 shots to get a couple that showed good page movement. I thought it turned out well and, of course, I like the aviation connection.

Flipping the Charts 2

Friday, September 07, 2007

Participate, and Vote For Me!

The CiN Weekly is conducting a neat project called Capture Cincinnati. It's pretty simple -- folks upload photos to the site and provide some photo information including assigning it to a chapter/category. For the next 44 days, you can view all the photos and vote for your favorites. The top photos in the various categories will be compiled into a book that captures greater Cincinnati. They will also put out a DVD with photos.

So if you have photos taken around the greater Cincinnati area, upload them! Read more about the details here.

Now, in a shameless bit of self promotion, please vote for me! I've uploaded several photos I've taken around the area and would appreciate some votes. I've added voting badges to my sidebar. You can see the entire set of photos here. There are some ice storm photos, recent fireworks photos, butterfly exhibit at Krohn, Zoo Blooms, etc. I also posted a couple Cincinnati Rollergirls photos in the sports section and one in the People section. I think it would be great to have a Cincinnati Rollergirl photo in the book -- right along with the other hometown teams like the Reds and Bengals. If Jason or Jeff are eligible, I hope they add some of their derby photos and let us know to vote. In any case, I'd appreciate votes and/or comments on the derby photos (and any others you like) from all the Rollergirl fans out there!

44 days left to upload photos and vote.

My First HDR Images

I've wanted to play with high dynamic range (HDR) images for awhile. An HDR image represents an exaggerated dynamic range of light intensity in a single image. I think it's nice for situations with very light spots and shadows where you want to bring out the detail in both areas. That's often hard to do in a single image. HDR images give some interesting effects.

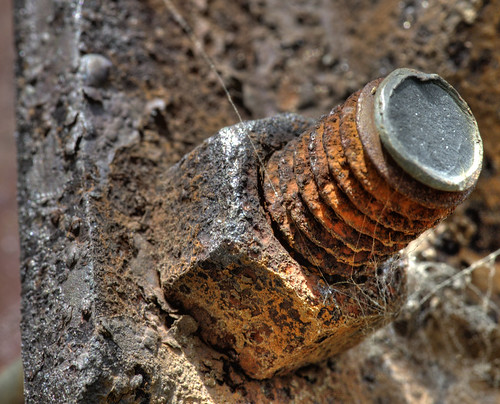
Just this week I got the Photomatix Pro software that creates HDR images from multiple images with varying exposures. Today I took some shots to try the software. This week the Macro Monday theme is 'rust.' While visiting Michele and John's garden, I noticed the outdoor basketball hoop next door had some interesting rust areas. I took some macro shots and used the Photomatix software to render some HDR versions. They turned out well for a first attempt. On the image below, you notice a shadow across the bottom portion of the hex nut. The rust detail in that shadow area was lost in a single image. By combining 4 images with various exposures, I brought out the detail in all the light and dark areas (like the spider web and rust on the bottom of the nut). Compare the HDR image below to this single image of a nearby area. The light was pretty flat as it was a bit cloudy. The rust detail on the single image just doesn't jump out as much. Check out my other HDR rust images here and here.

Thanks to Chris for pointing me in the right direction for HDR and panorama software. Check out his wonderful photos here.

Rust

Friday, August 03, 2007

Slice of Red Onion

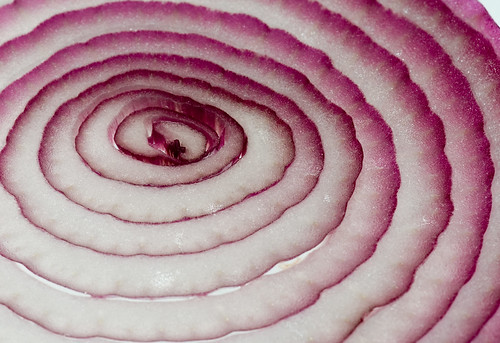
I've been playing around with some food photos for another macro photo project. I was happy with the way this photo of a slice of red onion turned out. I cut the onion very thin and put it on a thin, opaque piece of plastic that folks use to make stencils. I like it because it looks a lot like a plastic cutting board. The stencil is supported on a thin piece of glass. That lets me put a flash unit underneath so most of the light for the image is coming through the onion rather than being reflected from the surface. It's an interesting effect for semi-transparent subjects.

Red Onion Slice

Monday, July 30, 2007

Voice of America Park Panorama

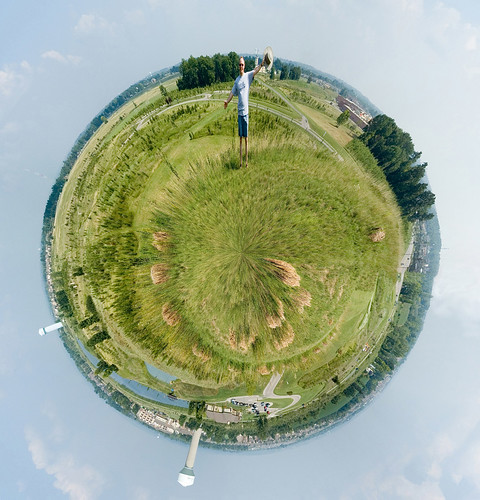
On Sunday, Dianne and I went to the former Voice of America site North of Cincinnati that has been turned into a park. It is a large parcel of land that has lots of wild growth to separate a lake for boating and fishing, many soccer fields, a pavilion, and a hill for sliding in the winter. We walked up the hill to take some photos for a panorama. Click here for a single photo of Dianne and me on top of the hill (the Voice of America building is just to the left of us in the background. Here is a 360 degree panorama from the top of the hill. Finally, thanks to the Daily Dose of Imagery site, I made a globe view from the panorama that shows me standing on top of Earl World. It's a neat effect with the water towers above the horizon.

Earl World Panorama Globe

Sunday, July 29, 2007

New 7 Wonders & Panoramas

You probably heard several weeks ago the New 7 Wonders project released the voting results for the New 7 Wonders of the World. What I just Stumbled Upon yesterday was a Danish site that has QTVR panoramas for each of the New Wonders. You control the view to pan and zoom the area around each of the Wonders. Very well done! Check 'em out.

Oh, by the way, the New 7 Wonders project is now taking nominations for the New 7 Wonders of Nature. Go to the project site to make your nomination.

Saturday, July 28, 2007

Textile Project

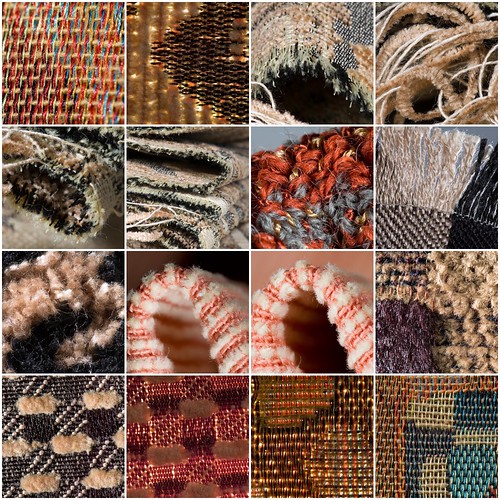
My project for the day was to take some photos for the "Macro Mondays" Flickr group. This week's theme is textiles. I used the exercise as another way to experiment with my new flash units. I'm getting a better feel for the effects created when you move them around or change the flash intensity. There are a lot of options to consider. I put some of the photos together in a mosaic shown below using fd's Flickr toys. You can also go here to see the entire textile set or click on the captions below to go to a larger version of each block in the mosaic. I think my favorite is the block in the lower right (textile 10). What do you think?

Many thanks to Cathy for providing a bag of fabric for this experiment!

Textile Composite

1. Textile 9, 2. Textile 8, 3. Textile 7, 4. Textile 6, 5. Textile 5, 6. Textile 4, 7. Textile 20, 8. Textile 19, 9. Textile 18, 10. Textile 17, 11. Textile 16, 12. Textile 15, 13. Textile 14, 14. Textile 13, 15. Textile 12, 16. Textile 10

Monday, July 23, 2007

Cicada Exoskeleton

I just got some new macro flash units for my camera. On Sunday I put together a macro photography light tent in the basement. I did a little playing with the flash units and the commander unit that controls them.

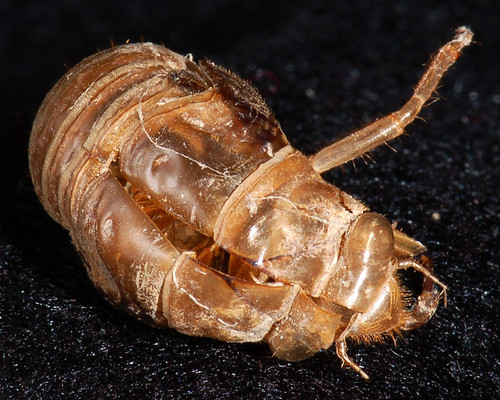
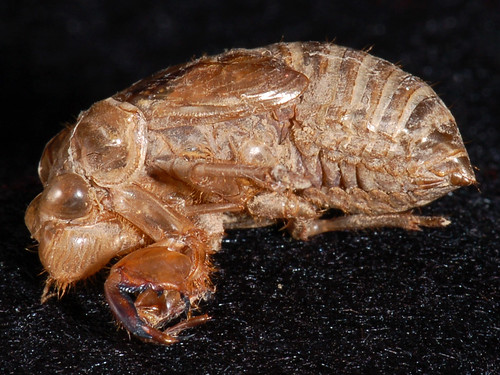
Thanks to Michele, I had a great subject to experiment with. She had sent over an exoskeleton she found in her garden that was left behind by a cicada. I took some photos from different angles. The first photo below shows the slit in the back where the cicada exited from the exoskeleton shell. Clicking on each photo will take you to larger versions in Flickr or you can go to the photo set here.

Cicada


Cicada

Thursday, July 19, 2007

A Spider's Snack

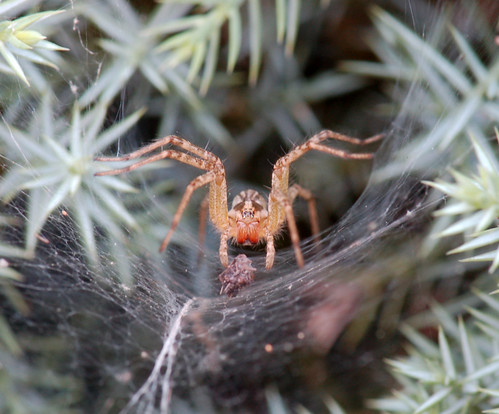
Caught this spider a few weeks ago. It had a snack all wrapped up for lunch.

Spider

Tuesday, July 10, 2007

Daisy

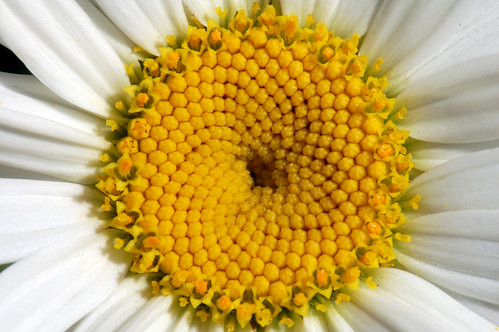
A couple weeks ago I spent some time taking shots of a single daisy outside of our neighbor's place. The entire daisy set is here on Flickr. I also did some Photoshop manipulation of this photo (click here to see it) for the Focal Black&White pool on Flickr.
Daisy 8